Extract data from an email
Modified on Thu, 1 Oct at 2:04 PM
Need only part of an email, like a delivery address, an order number, or a list of products? The data extractor pulls out exactly what you need so you can use it in any action: print it, save it, or send it in a reply.
To do this, create a data extractor template once, then select it in your actions.
Step 1: Create a template
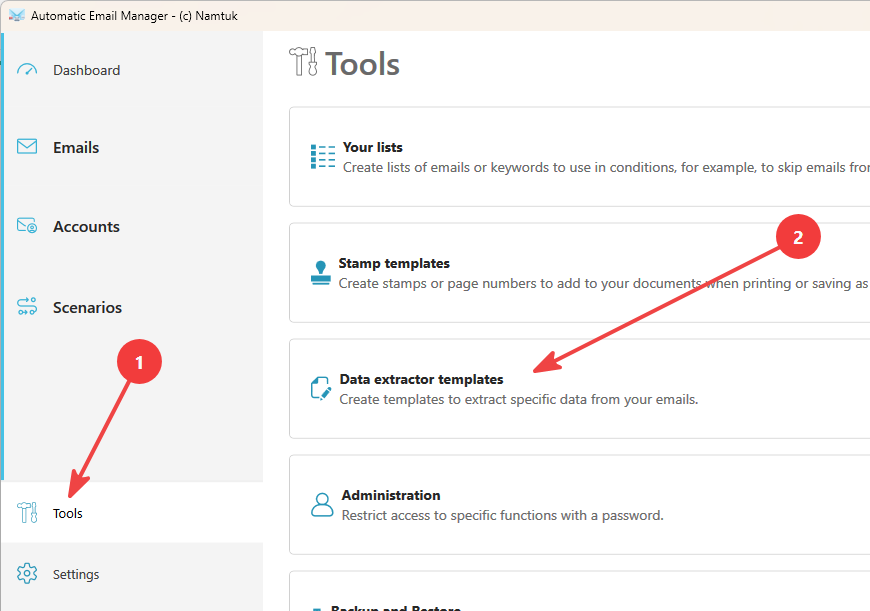
- In the left menu, click Tools, then Data extractor templates.
- Click Add new extractor, or select an existing template to edit it.
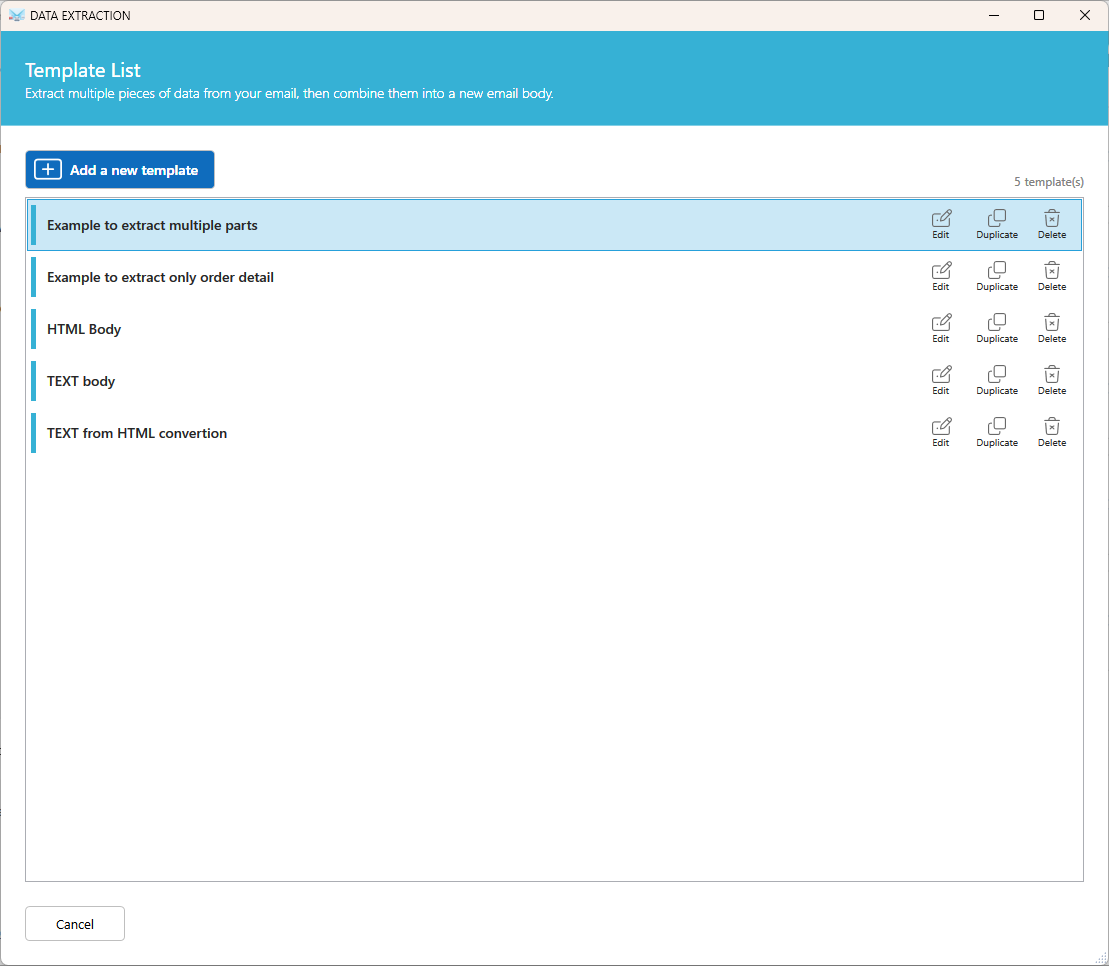
Note: Three system templates are always available and can't be deleted:
- HTML body: the full email content in HTML format, if available.
- TEXT body: the full email content in plain text, if available.
- TEXT from HTML conversion: converts the HTML content to plain text. Ideal for receipt printers or raw data.
Step 2: Define what to extract
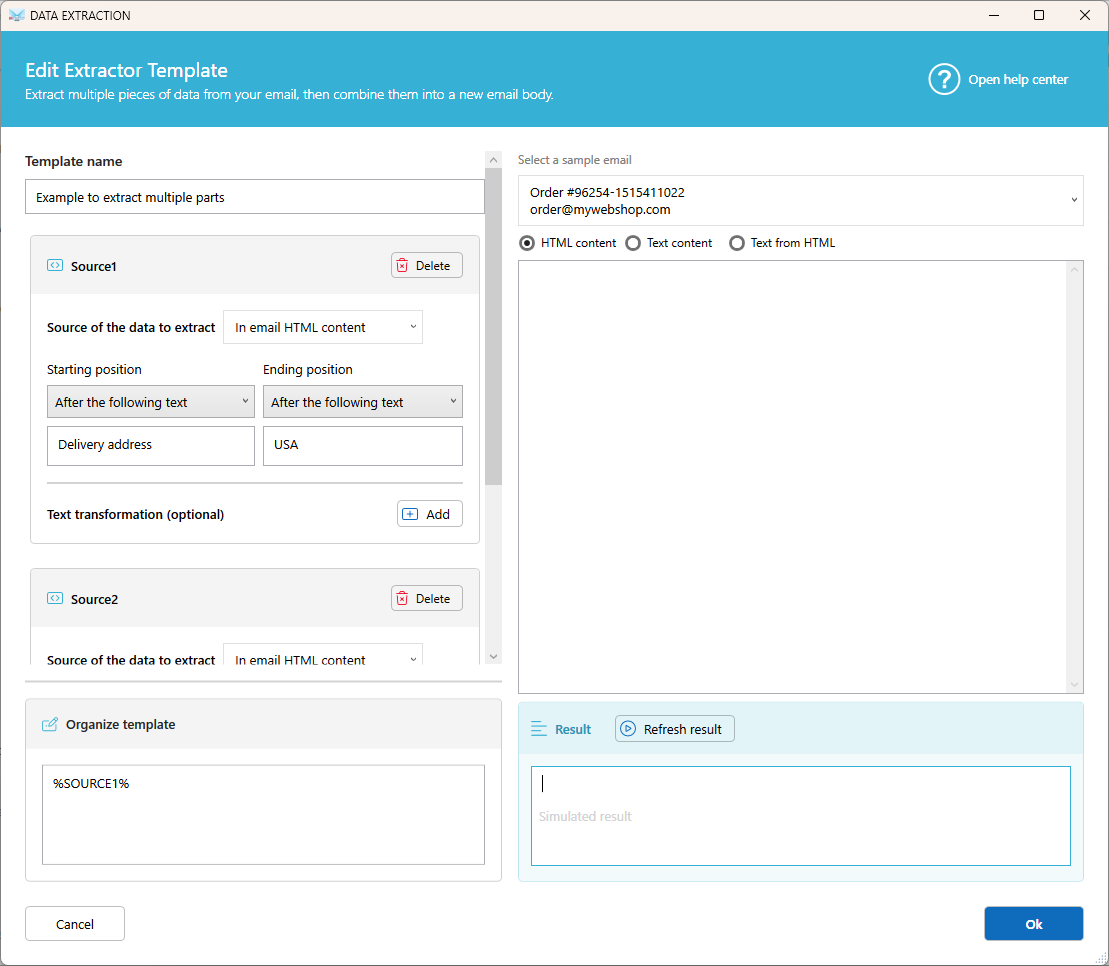
1. Name your template
Enter a name that tells you what it does, for example Delivery address.
2. Choose the source
Select where the text is searched:
- In email HTML body: the formatted version of the email.
- In email TEXT body: the plain-text version of the email.
- In TEXT format from HTML conversion: converts the HTML to plain text first. Use it when the email has no text version.
3. Set the start and end positions
Tell Automatic Email Manager where the data begins and where it ends.
Start position:
- From beginning of document
- After the following text: starts right after a keyword you enter.
- From the following text: starts at the keyword, including it.
- From number of character
- From number of line
- Using RegEx: enter a regular expression.
End position:
- To the end of document
- To end of line
- To number of character
- To number of line
- Using RegEx: enter a regular expression.
4. Clean up the result (optional)
Add transformations to adjust the extracted text:
- Replace text: find a text and replace it with another.
- Remove text: find a text and delete it.
- Keep left text: keep the first x characters.
- Keep right text: keep the last x characters.
- Select mid text: choose the starting character and how many characters to keep.
- Add text before: insert text before the result.
- Add text after: insert text after the result.
5. Organize the final output
In Organize template, combine several extracted parts in the order you want. You can add your own text or line breaks between them.
6. Test with a real email
Your latest emails are listed on the right. Select one that contains your data, then click Refresh result to preview the output. Adjust your settings until the result is what you expect.
Step 3: Use the template in an action
- Open the scenario you want to edit, or create a new one.
- Add or edit an action, for example Print email body.
- Click More options...
- In Use these email data, select your template.
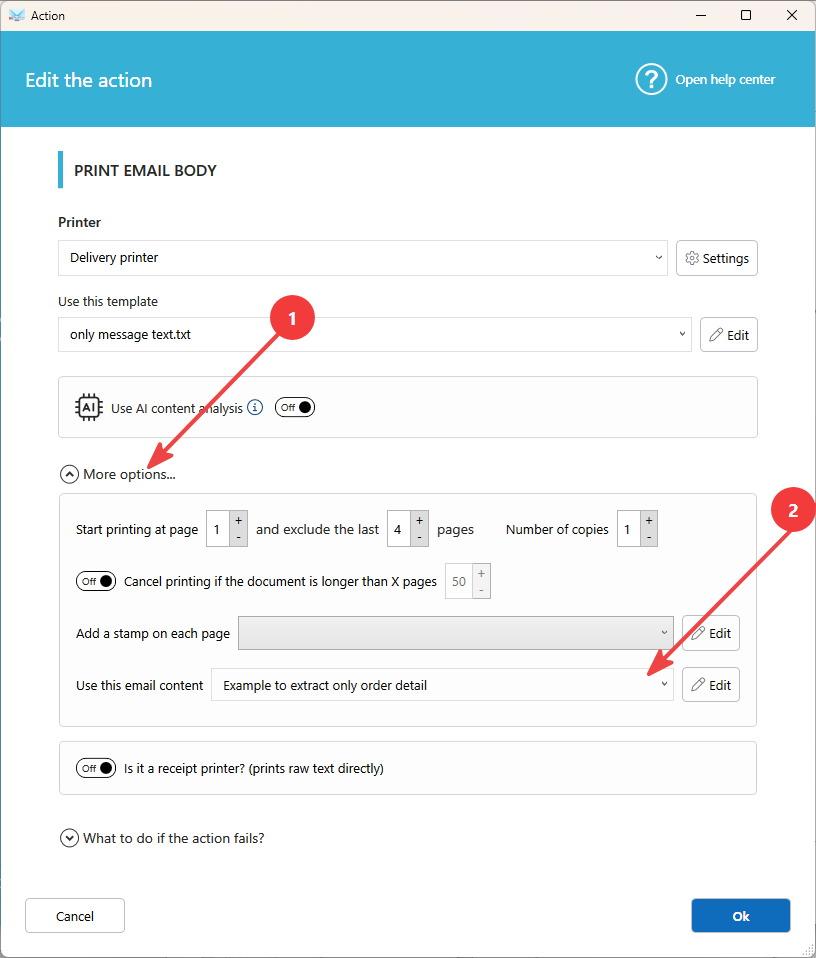
From now on, the action uses only the extracted data instead of the full email.
Tip: You can use the same template in several actions and scenarios.
Was this article helpful?
That’s Great!
Thank you for your feedback
Sorry! We couldn't be helpful
Thank you for your feedback
Feedback sent
We appreciate your effort and will try to fix the article