Action: Assign a category
Modified on Thu, 1 Oct at 5:12 PM
Automatically sort your incoming emails with colored categories, directly on the server. The category can be a fixed name, like Invoices, or built from the email itself, like the sender name.
Available for Office 365 and Exchange accounts only.
Add the action
- Create or edit a scenario.
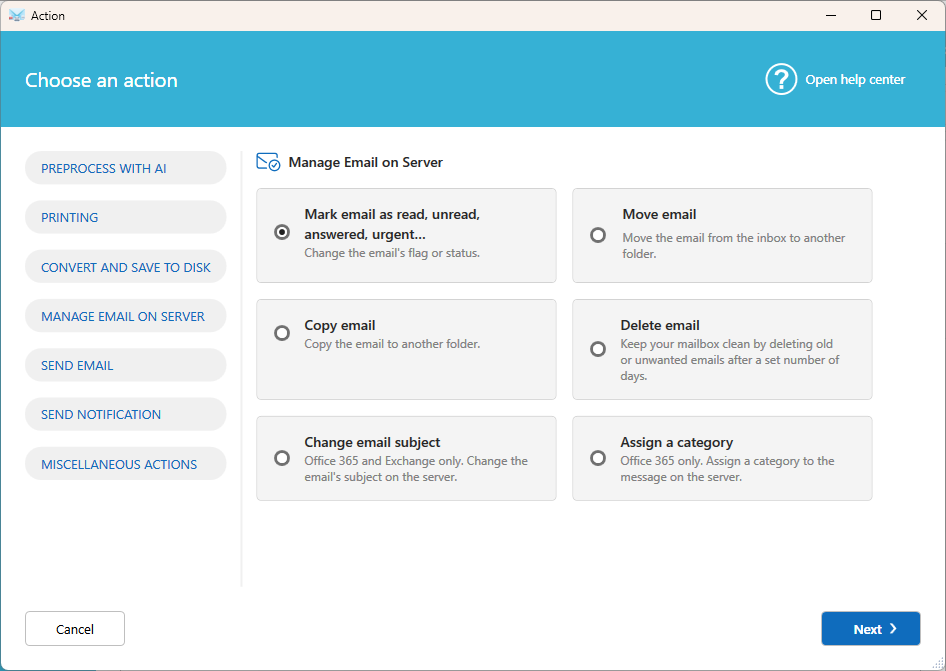
- Click Add action, then select Manage email on server, then Assign a category.
- Configure the action:
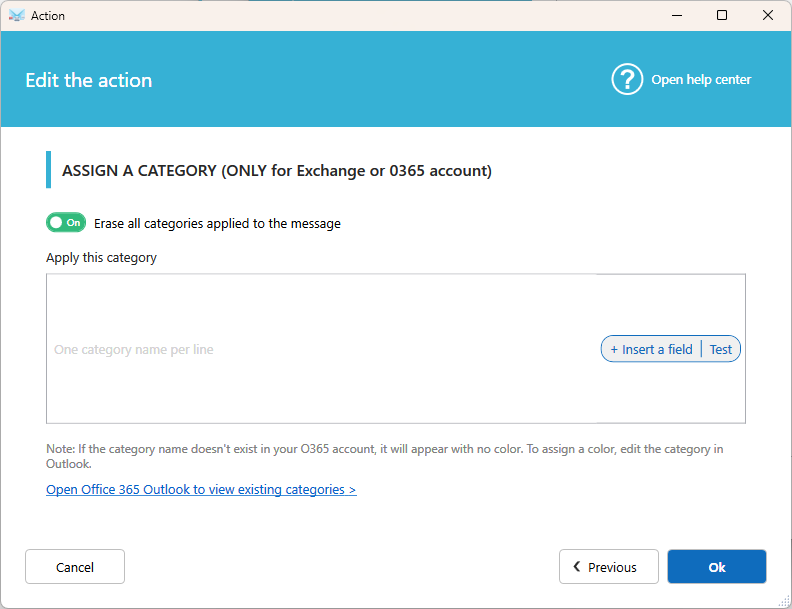
- Erase all categories applied to the message: Removes the categories already assigned to the email.
- Apply this category: Enter the category name. To apply several categories, enter one per line. Click Fields to use email data as a category name, for example the sender name or the subject.
Note: If the category doesn't exist in your Office 365 account yet, it is created without a color. To set a color, open Outlook and edit the category there.
Examples
- Sort by customer: use the sender name field as the category. Each customer gets their own category.
- Flag important emails: add a condition on the subject, then apply the category Urgent.
- Start fresh: turn on Erase all categories to replace existing categories with the new one.
Tips
- Combine this action with a condition to categorize only the emails you need.
- Add Mark email as read, unread, answered, urgent to the same scenario to complete the sorting.
Was this article helpful?
That’s Great!
Thank you for your feedback
Sorry! We couldn't be helpful
Thank you for your feedback
Feedback sent
We appreciate your effort and will try to fix the article