Add your first email account
Modified on Thu, 1 Oct at 4:02 PM
An account connects Automatic Email Manager to a mailbox. When a new email arrives, the scenarios you've chosen are run automatically.
New here? View a video of key concepts of Automatic Email Manager »
Start
In the left menu, click Connect your email.

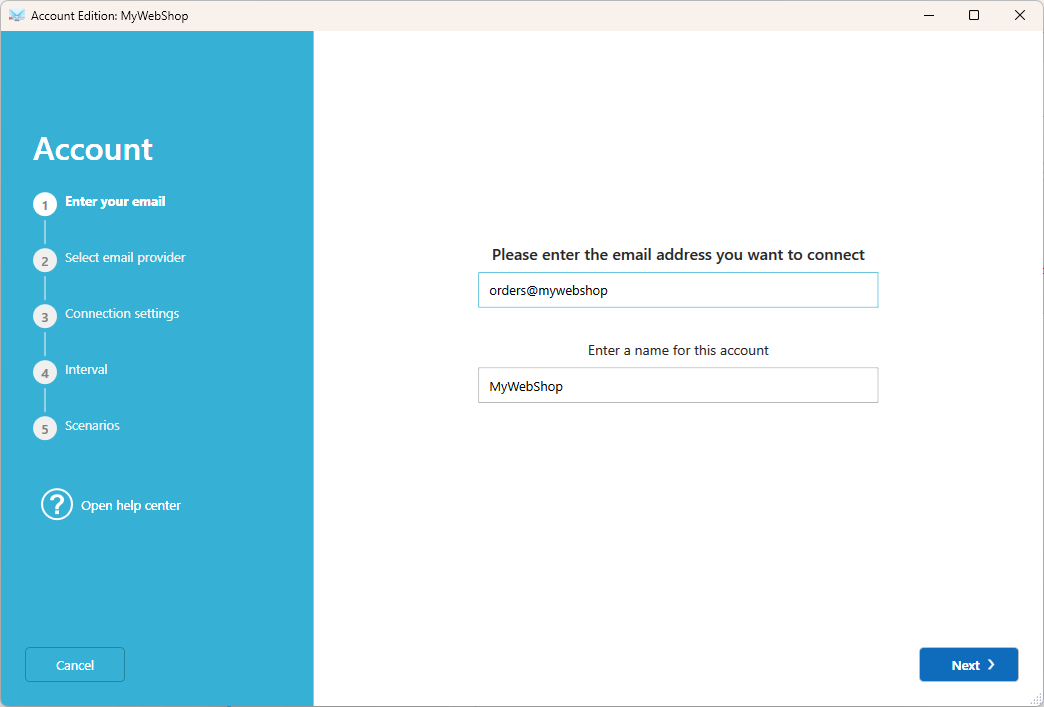
Step 1: Enter your email address
Enter the email address you want to connect, then give the account a name. This name is only used inside Automatic Email Manager.
Note: Select Use the advanced mode to set up the account to skip automatic detection and enter every setting yourself.
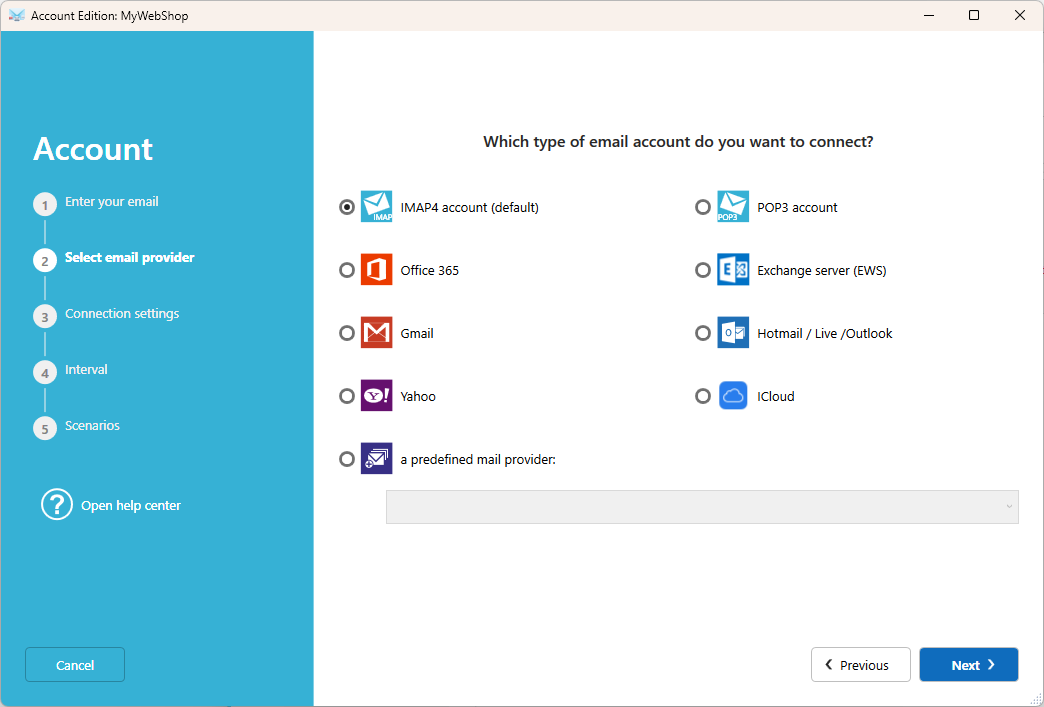
Step 2: Choose the connection type
If the connection type isn't detected automatically, select it from the list. IMAP4 is selected by default. It's fast, reliable, and supported by most email providers.
Step 3: Set the connection parameters
If needed, enter your mail server address, usually mail.yourdomain.com or imap.yourdomain.com, along with your login details. Click Test connection to check that everything is correct.
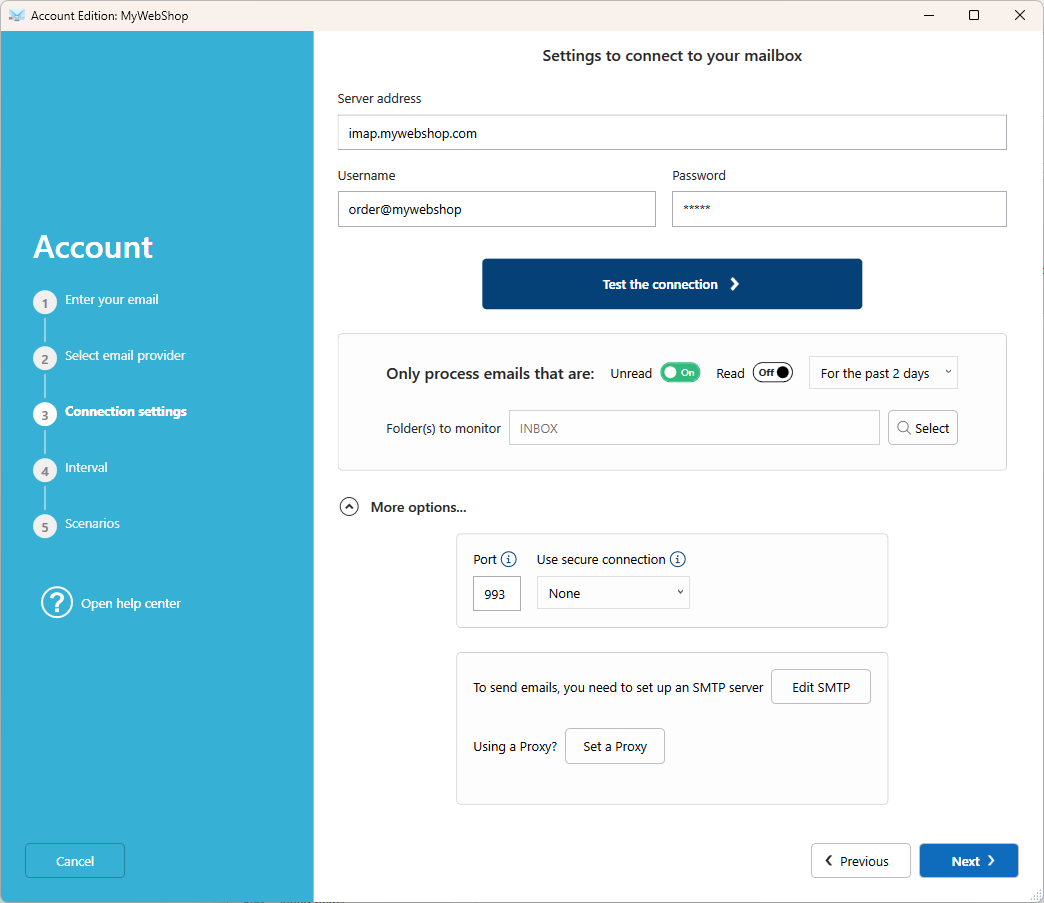
Then choose which emails to process:
- Get all emails
- Get only unread emails
You can also limit processing to emails received in the past number of days.
By default, the Inbox is monitored. Click Search to select another folder.
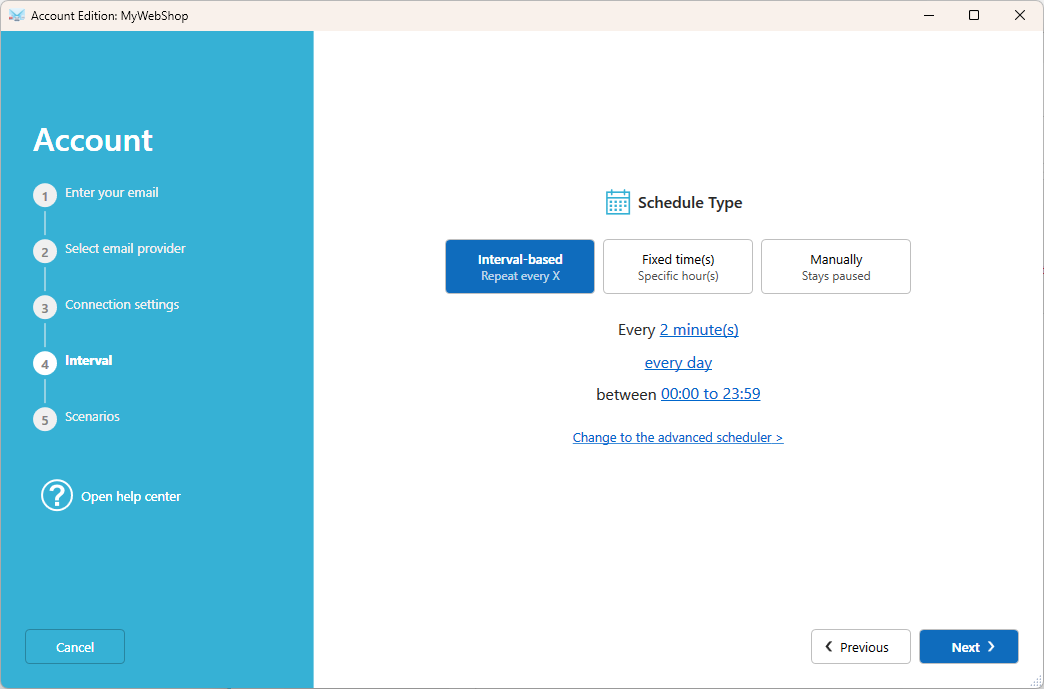
Step 4: Choose when to check for new emails
Select how often the mailbox is checked:
- Every x minute(s) and x second(s)
- Everyday at fixed times
- Manually: a single manual check, then the account is paused.
Tip: Need to check the account only on certain days or hours? Click on 'Change to the advanced scheduler'.
Step 5: Select your scenarios
A scenario is a list of actions applied to each new email, like printing, saving to PDF, or replying. Click Add a scenario to select an existing one, or click New scenario to create one. The same scenario can be used by several accounts.
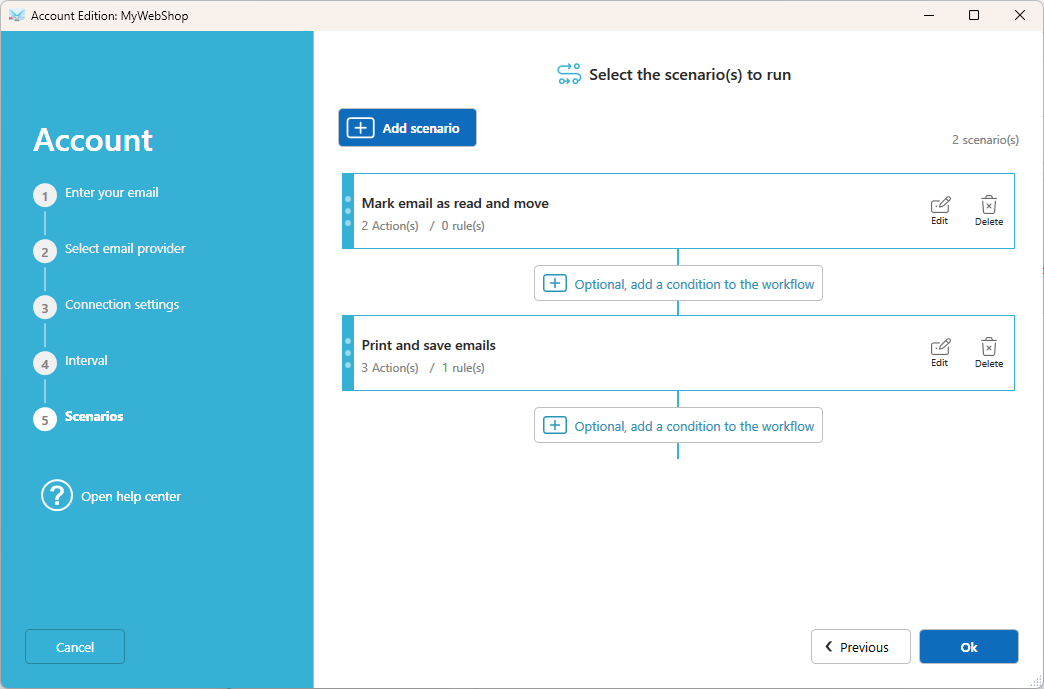
Note: Move email and Copy email actions are specific to each mailbox and can't be shared. Create a separate scenario for each account that uses them.
What's next?
Your account is now ready. New emails are processed as soon as they arrive, and you can follow everything from Dashboard and Activities.
Related articles
Was this article helpful?
That’s Great!
Thank you for your feedback
Sorry! We couldn't be helpful
Thank you for your feedback
Feedback sent
We appreciate your effort and will try to fix the article