Add a stamp, watermark, or QR code to your documents
Modified on Thu, 1 Oct at 6:40 PM
Stamps let you add text, images, barcodes, and QR codes on top of your emails and attachments. They are applied when you print or convert to PDF.
Common uses:
- Mark archived documents with Received on and the date.
- Add Confidential or Urgent on printed pages.
- Print a QR code on an order, for example a link to a Google Maps address.
- Add page numbers.
Create a stamp
- In the left menu, click Tools, then Stamp templates.
- Click New stamp, or select an existing stamp to edit it.
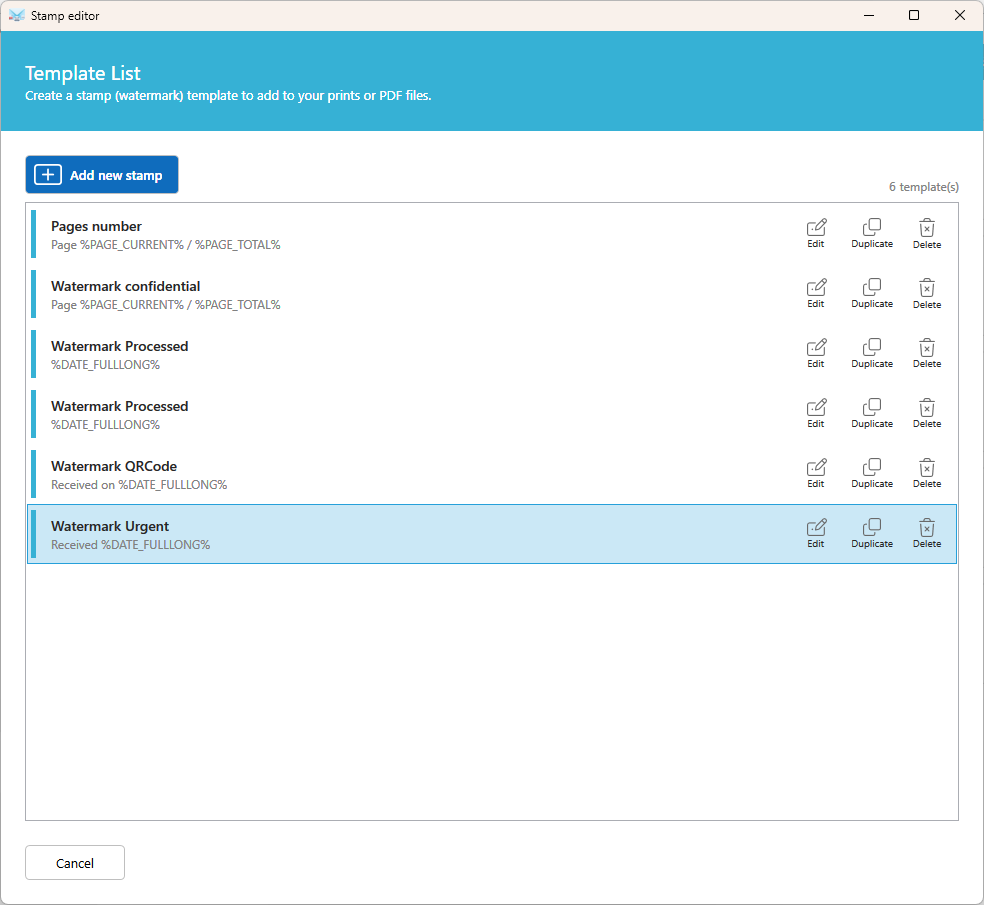
- Give your stamp a name, then set up its content as described below.
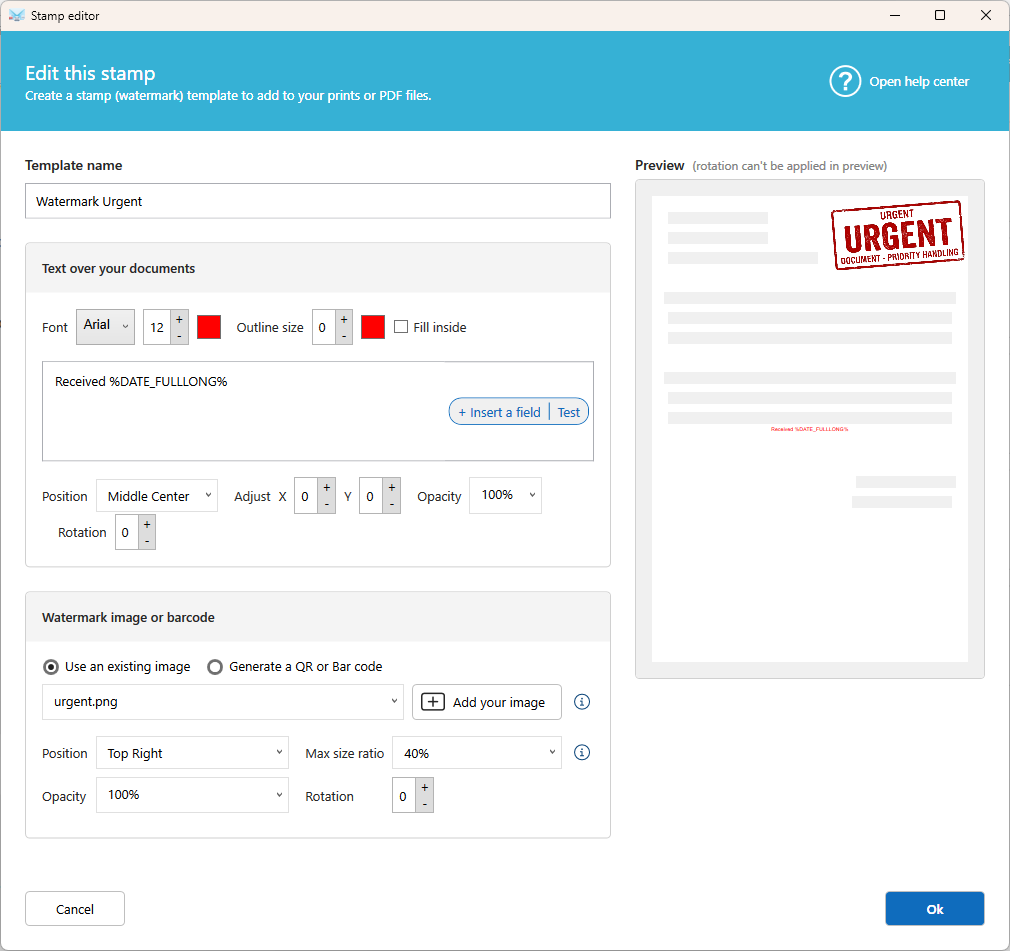
Text
Add text over the document.
- Text: Enter the text to print. Click Fields to insert email data, such as the date, the sender, or the subject.
- Font name and Font size: Choose the look of the text.
- Color: Choose the text color.
- Border size and Fill border: Add a frame around the text.
- Position: Select where the stamp appears on the page. Use Adjust position to fine-tune it.
- Transparency: Make the stamp see-through so it doesn't hide the original content.
- Angle: Rotate the stamp, in degrees.
Image (watermark)
Add an image over the document.
- Image: Select an existing image, or generate a QR code. Ready-to-use images like Confidential and Urgent are provided. To add your own, copy them to this folder:
C:\ProgramData\Namtuk\AEM10\Templates\Stamps - Position: Select where the image appears on the page.
- Max size ratio: Limit the size of the image. For example, a large image never covers more than 40% of the page width.
- Transparency: Make the image see-through so it doesn't hide the original content.
- Angle: Rotate the image, in degrees.
Barcode and QR code
- Generate a code from your email data:
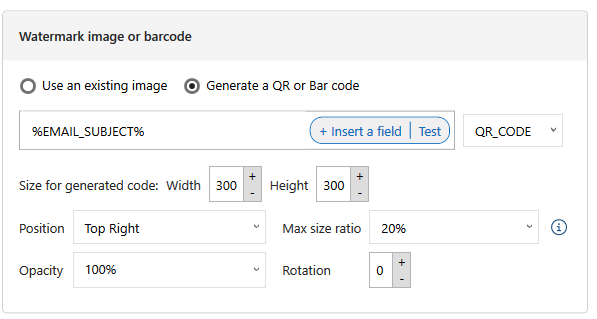
- Fields: Select the data to encode. For example, a value extracted from the email with a data extractor template.
- Format: Select the code type, such as QR or EAN13.
Use a stamp in an action
- Open the scenario and edit an action that supports stamps, such as Print email body, Save email to disk, Print attchments....
- Click More options...
- Turn on Add a stamp and select your template.
Tip: Set a low transparency on watermarks so the original text stays readable.
Related articles
- Action: Print email body
- Action: Print attachments
- Action: Save email to disk
Was this article helpful?
That’s Great!
Thank you for your feedback
Sorry! We couldn't be helpful
Thank you for your feedback
Feedback sent
We appreciate your effort and will try to fix the article